Understanding Admin Roles, Project Roles, and Permissions
In this article
- 🔐 What’s the Difference?
- 🧩 Create an Admin Role
- 🏗 Create a Project Role
- 👥 Assign an Admin Role
- 🧱 Assign a Project Role
- 🚀 Bulk Change Roles
- 🗑 Delete a Role
- ✨ Tips & Best Practices
GoBuid allows flexible permission control by separating Admin Roles and Project Roles. This guide explains how they differ, where to manage them, and how to assign roles to your team.
⚠️ Permissions are only available in the WebApp.
Sign in to GoBuid WebApp. → Go to Permissions from the left sidebar in settings.
Only users with access (by default, Owner, Co-owner, Admin) can view or edit the Permissions page.
🔐 What’s the Difference?
| Role Type | Scope | Controls Access To… | Assigned When… |
|---|---|---|---|
| Admin Role | Company-wide | Admin Console, timesheets, equipment, members… | During invite or via the Members page |
| Project Role | Per Project | Tasks, reports, budgets, documents (within project) | During invite or via the Project page |
🧩 Create an Admin Role

- Go to the Permissions page and click Admin Role.
- Click Add to open a new role dialog.
- Name the role (e.g., “Admin Manager”).
- (Optional) Copy permissions from another role.
- Click Create.
- Use toggle switches to define access (e.g., manage members, timesheets).
🔎 Admin Roles control what users can access across all projects and modules.
🏗 Create a Project Role

- Go to the Permissions page and click Project Role.
- Click Add to open a new role dialog.
- Name the role (e.g., “Client”).
- (Optional) Copy from an existing role.
- Click Create.
- Use toggle switches to define what users can do in projects (e.g., edit tasks, manage budgets).
🔎 Project Roles are scoped to individual projects.
👥 Assign an Admin Role

Admin Roles are required when inviting new members.
You can change a member’s Admin Role in two ways:
- From their member details page
- From the row actions on the Members table

🧱 Assign a Project Role
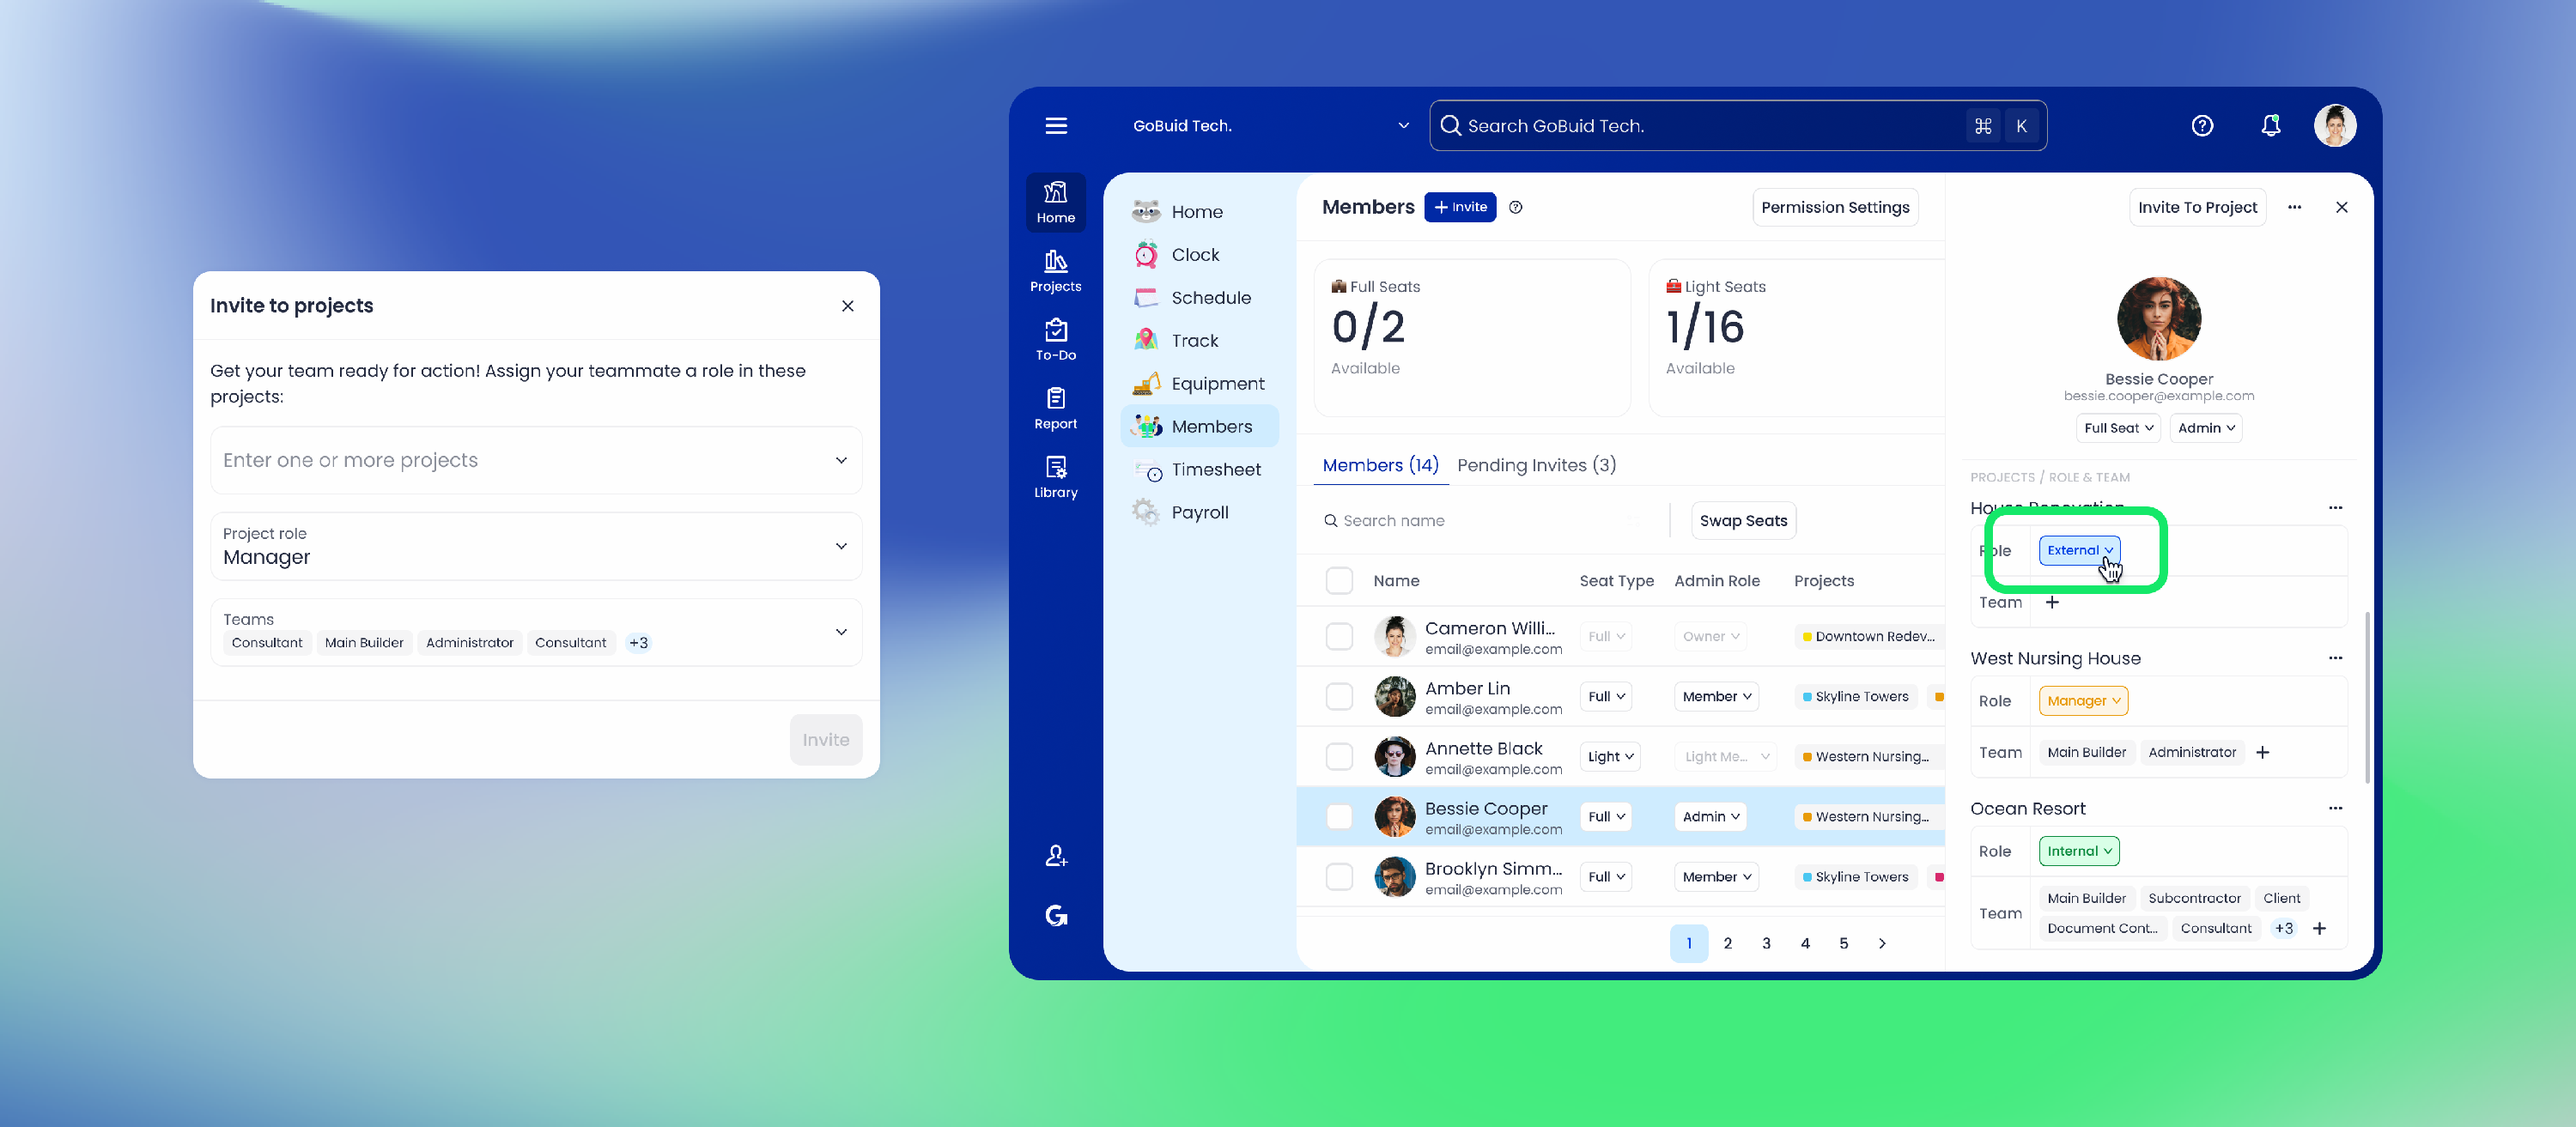
Project Roles are needed when adding a member to one or more projects.
You can update a member’s Project Role in two ways:
- From their member details page
- From the Project page where they are assigned
🚀 Bulk Change Roles
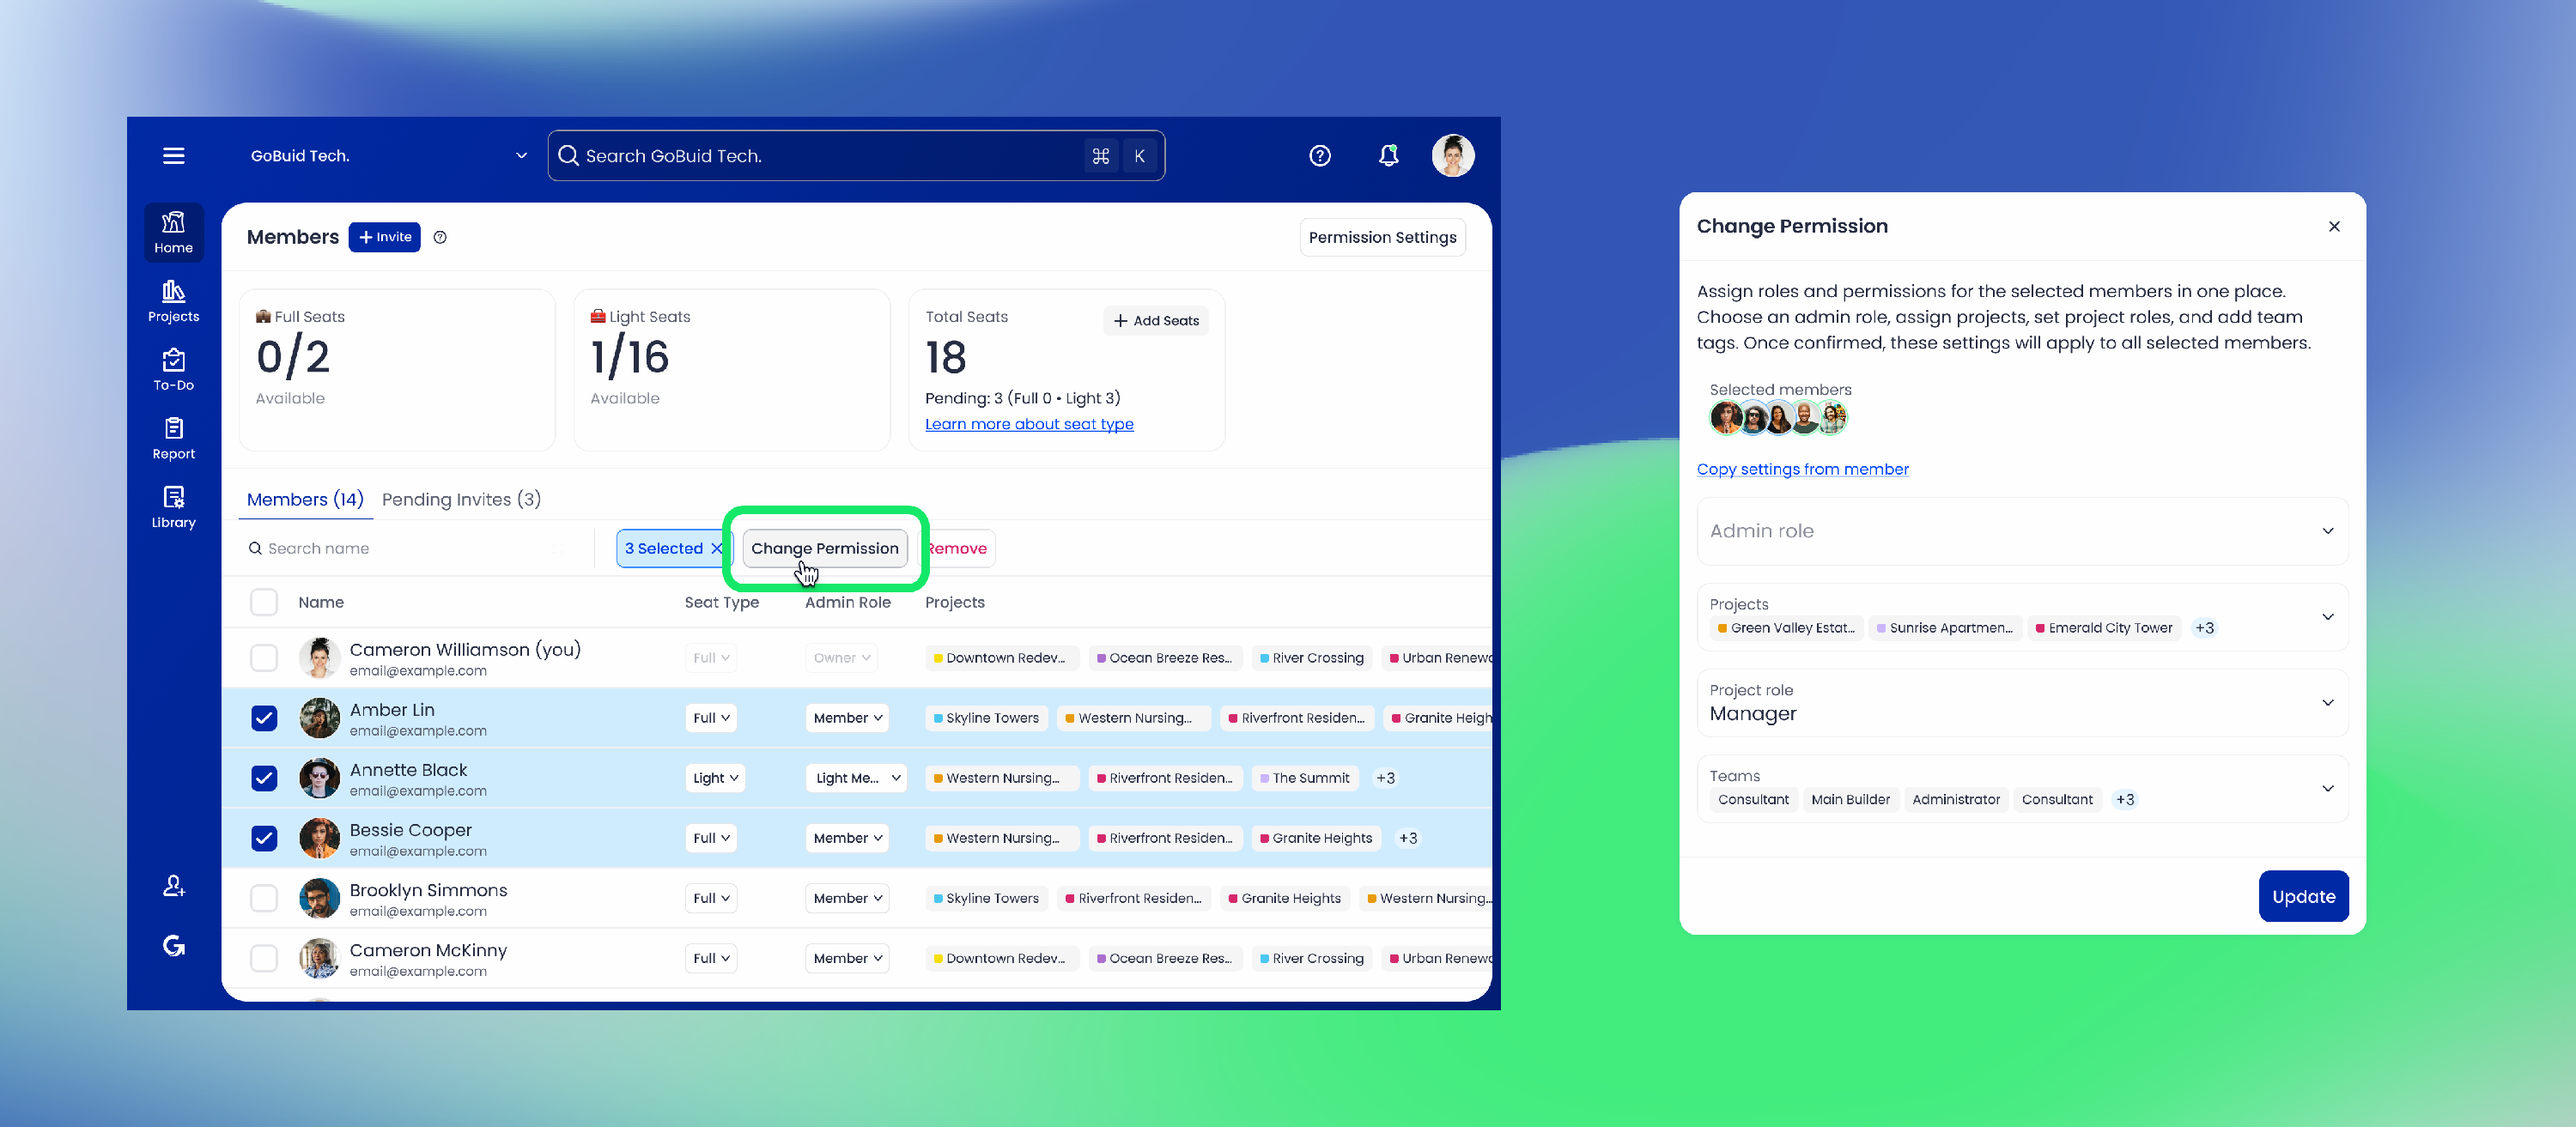
Save time by updating roles for multiple members at once.
- Go to the Members page
- WebApp: Select users via the checkboxes; MobileApp: Select users via long press
- An action bar will appear → Click Change Permission
- Assign an Admin Role, select Projects, and set Project Roles
- Confirm to apply updates to all selected members

🗑 Delete a Role
You can delete any custom Admin or Project Role:
- Go to the Permissions page
- Click the ”…” icon next to the role
- Choose Delete
⚠️ Built-in roles cannot be edited or deleted.
Admin Role Defaults:
Owner, Co-owner, Admin, Member, Light Member
Project Role Defaults:
Manager, Internal, External, Light Member
✨ Tips & Best Practices
- Give roles clear names so teams understand what access they’re granting.
- Use role copying to speed up setup.
- Combine Admin Role + Project Role assignment during onboarding for faster setup.
- Use bulk role changes to manage large teams efficiently.